
How to Build a Swimming Pool at Home in 6 Steps
Understanding how to build a pool starts with recognizing the complexity of the entire construction process. While it’s likely you cannot literally build your own swimming pool without professional services due to technical requirements and safety regulations, understanding each step helps you make informed decisions and work effectively with your construction team.
Proper planning and professional guidance are essential for successful pool projects. Each phase builds upon the previous work, and mistakes early in the process create expensive problems later. Tactfulness is key; let’s explore.
Step 1: Planning and Design Phase
At the very beginning, you need a site evaluation to determine whether your property can support a pool, and undergo soil testing to reveal ground conditions. All of these results affect construction methods and costs. For example, rocky soil increases excavation costs, while clay soil may require additional drainage measures.
Determining pool size, shape, and features involves balancing your desires with practical constraints. Your yard size, budget, and intended use will guide these decisions. Next, you’ll need to obtain the necessary permits and approvals. This takes time but prevents legal problems later. Most jurisdictions require building permits, electrical permits, and sometimes health department approvals.
Creating detailed construction plans and a timeline with your professional service sets expectations for the entire project, and should include structural drawings, electrical layouts, and plumbing diagrams that guide construction.
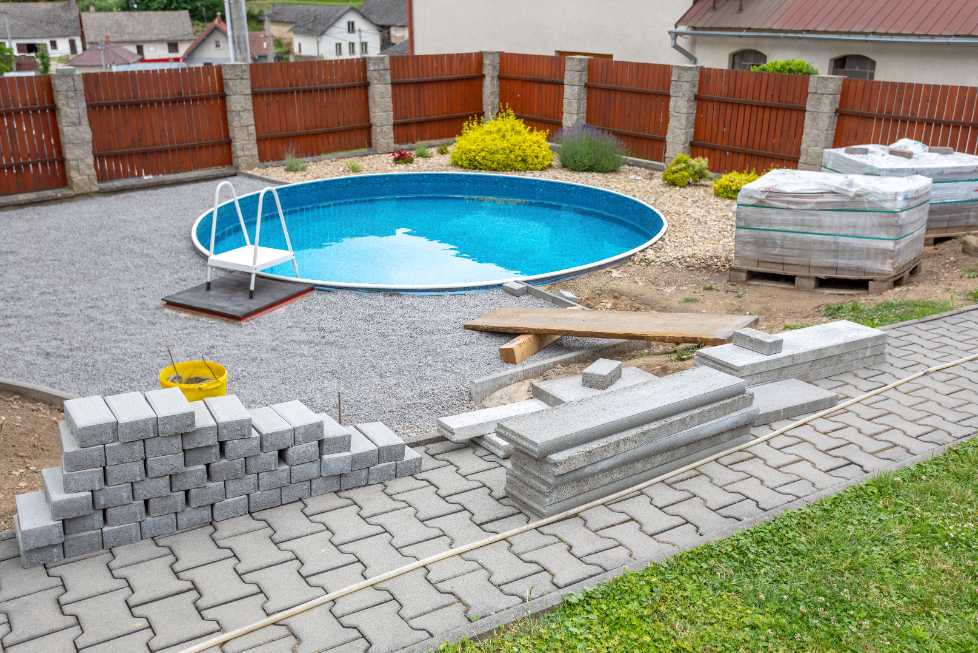
Step 2: Excavation and Site Preparation
The physical work begins with marking utilities and property lines to prevent dangerous accidents and legal disputes. Professional utility marking services will locate underground lines before any digging starts.
Excavating the pool area requires precision work – the hole must match exact specifications for depth, slope, and dimensions. Professional excavation equipment creates smooth, properly graded surfaces that support the pool structure.
Preparing the foundation base involves compacting soil and adding gravel or sand layers that provide stable support for the pool shell.
Step 3: Structural Installation
Installing a steel reinforcement framework creates the skeleton that gives your pool its strength. Your pool will need rebar placement following engineering specifications that ensure the structure can handle water pressure and soil movement.
Next, the plumbing and electrical work happen before concrete application when access remains easy. This includes main drain lines, skimmer connections, return fittings, and electrical conduits for lights and equipment.
Finally, the actual pool shell is poured, usually using concrete or gunite. This is a complex process requiring specialized equipment and expertise, but is one of the most important in how to build a swimming pool. The material gets pneumatically applied over the steel framework, creating a single structure that forms your pool’s permanent shape.
Step 4: Interior Finishing and Equipment
With the shell down, the pool now needs an interior smooth, waterproof swimming surface. Options include traditional plaster, aggregate finishes, tile, or vinyl liners, each with different appearance, durability, and cost characteristics.
Next, you’ll need to install necessary pool equipment that performs circulation, filtration, and heating. Pumps, filters, heaters, and chemical feeders get connected to the plumbing rough-in work completed earlier.
Electrical connections and safety systems include pool lights, GFCI protection, and emergency shutoffs (if required by electrical codes) and are added next. Finally, decking installation creates a finished pool perimeter.
Step 5: Water System Setup and Testing
The pool is now ready for water, but while the initial water filling marks an exciting milestone, the pool is not ready for swimming yet. The first fill allows testing of all systems and reveals any leaks that need immediate attention.
Equipment testing and system calibration ensure everything operates correctly. Flow rates, pressure readings, and heating systems then get adjusted to manufacturer specifications. Additional safety inspections and final approvals verify the installation meets all code requirements.
Step 6: Final Touches and Landscaping
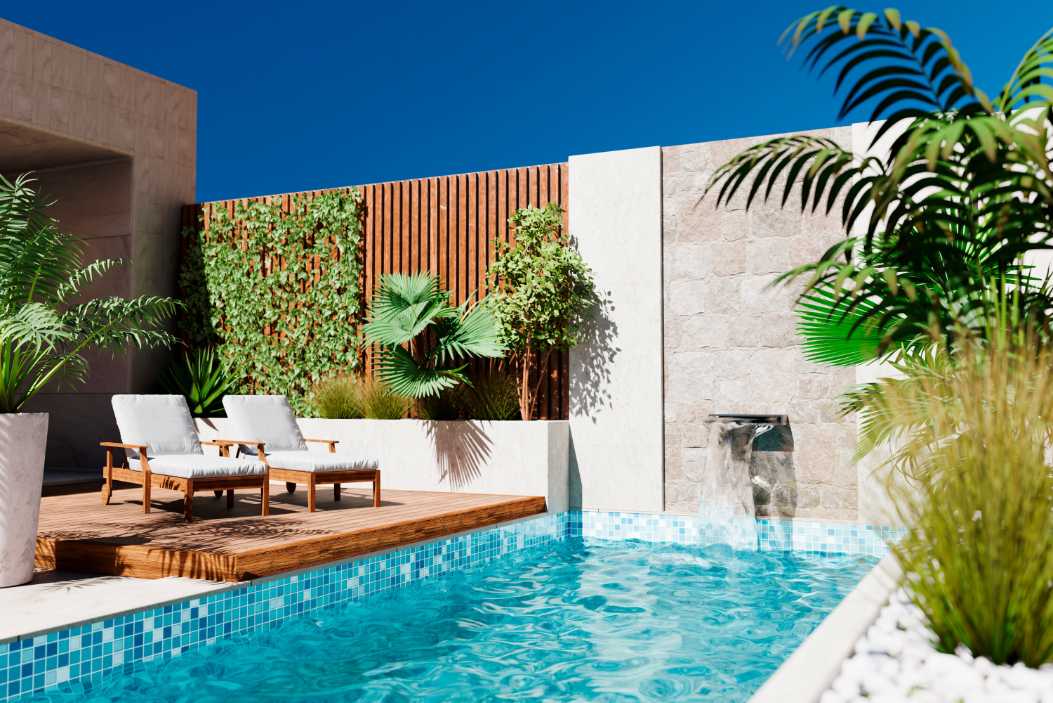
With the pool itself finished, the final step is to create the entire pool area. Patios, walkways, and planted areas create a cohesive design that looks great and enhances the overall atmosphere. There are also functional add-ons, like automatic covers, water features, and landscape lighting that can extend pool use into the evening hours.
The final cleanup and project walkthrough are the official marks of completion. Your contractor should remove all construction debris and explain warranty coverage, and your pool maintenance team should educate you on how to perform simple maintenance on your own.
Build Your Own Swimming Pool with Pools & Courts
When you learn how to build an inground pool, it reveals the complexity that requires professional expertise every step of the way. From start to finish, timelines typically range from 6 to 12 weeks for standard pools, while those with custom features may add time.
In the end, successfully building a swimming pool in the Middle East hinges on working with experienced pool builders who understand local conditions and regulations. For guidance on your pool project, consulting with specialists for swimming pool construction in Saudi Arabia like Pools & Courts ensures proper planning, quality construction, and long-term satisfaction.